My Mural Painting Journey
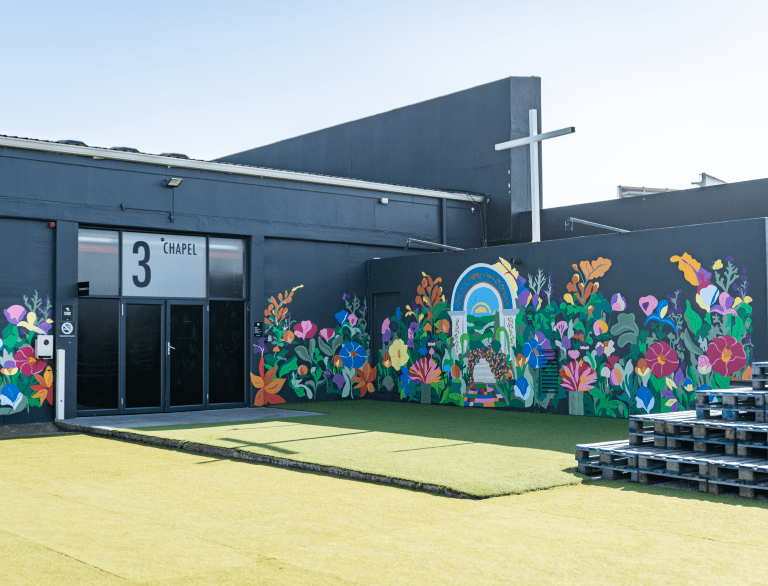
Recently, I had the pleasure of working on a vibrant mural for Father’s House Church in Mandela Bay. This project was a wonderful opportunity to bring bold colours and meaningful imagery to a community space, and I wanted to share the process behind the work!
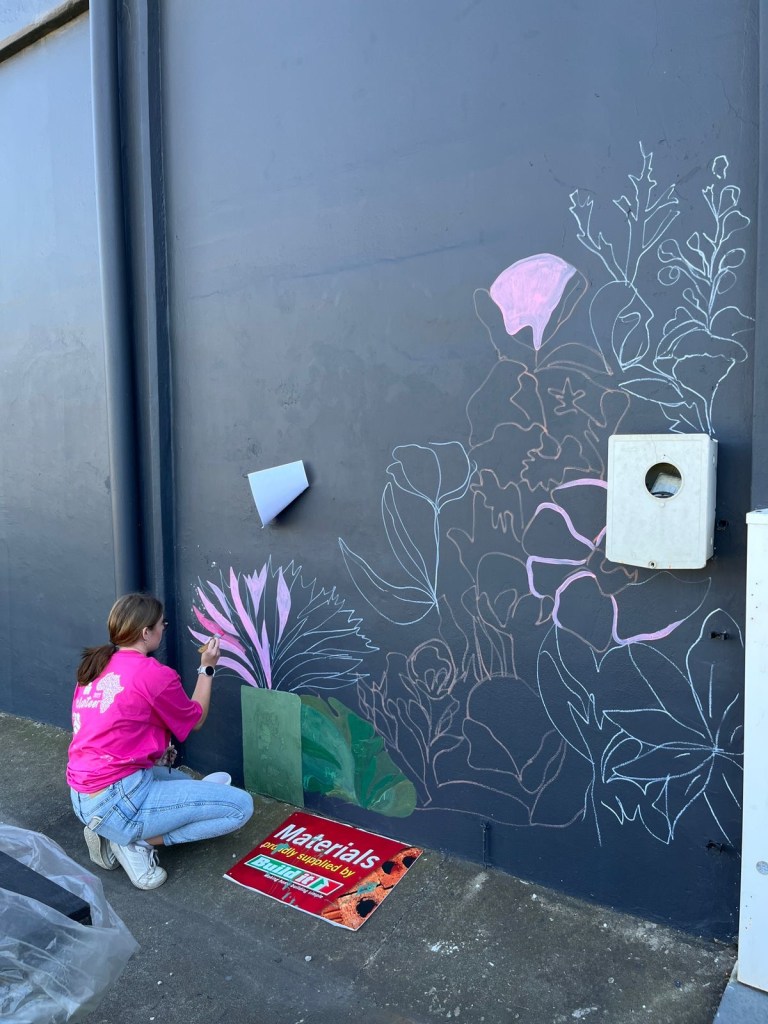
Step 1: Projecting and Outlining
Once I had the design ready, I started by projecting it directly onto the wall. This step allowed me to transfer the layout precisely, ensuring every element was in the right place. I traced the main lines, using the projection as a guide to keep proportions accurate and to give myself a clear roadmap for the next stages.
Step 2: Painting in the Colours
With the outline in place, the real fun began—adding colour! I started with large, flat areas, carefully choosing colours that would bring energy and warmth to the space. Layer by layer, the wall transformed as each colour was filled in, bringing the design to life. This part took some time, but watching the design evolve with every brushstroke made it incredibly rewarding.
Step 3: Adding the Final Details
The last step was all about the details that make a mural come alive. I went back over the design to add highlights, shadows, and finer lines to enhance depth and make certain elements stand out. These final touches brought dimension and vibrancy to the piece, creating a finished look that could really connect with the space and the community.
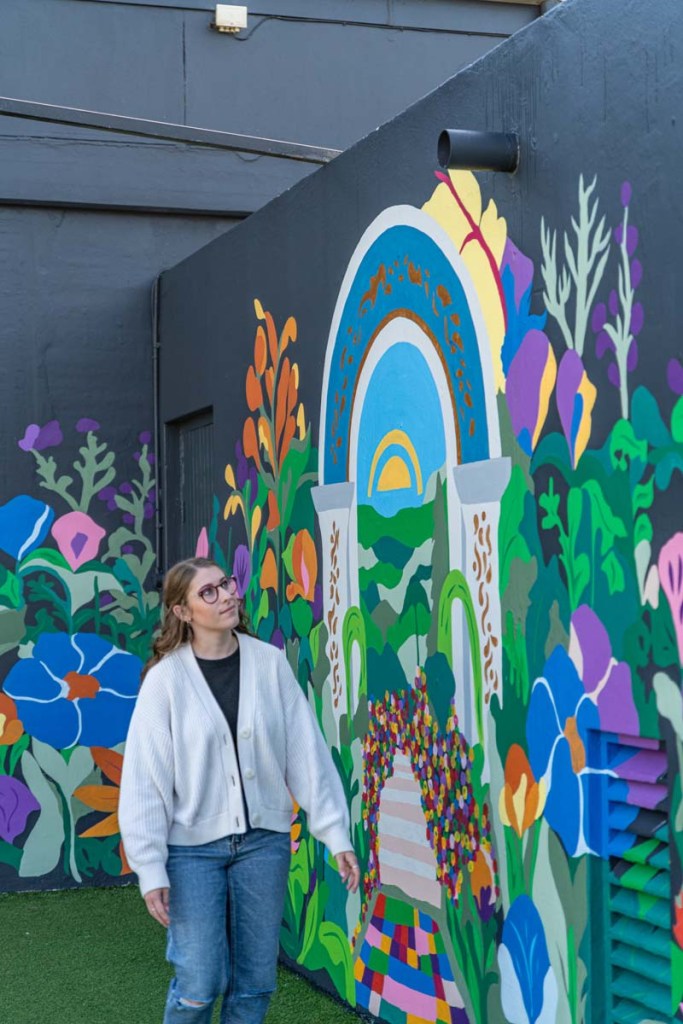
Creating this mural was an inspiring journey, and I’m so grateful for the chance to contribute something colourful and uplifting to Father’s House Church. I hope it brings joy and inspiration to everyone who sees it!
